Setting Up Your Feather Flag Fiberglass Pole Kit
Setting up one of Feather Flag Nation’s high-quality flag and fiberglass pole kits are very easy to do. We do get an occasional call or email asking about assembly instructions, but customers manage well on their own.
Feather Flag Nation pole kits are meant to be simple to put up. All the better to get your feather banner flag ready to go. Assembly requires no extra tools!
These instructions are for the fiberglass pole kit which comes with the travel package ($14.99 upgrade). This pole differs from the standard aluminum because it is straight and can be bent, whereas the aluminum tip is pre-bent.
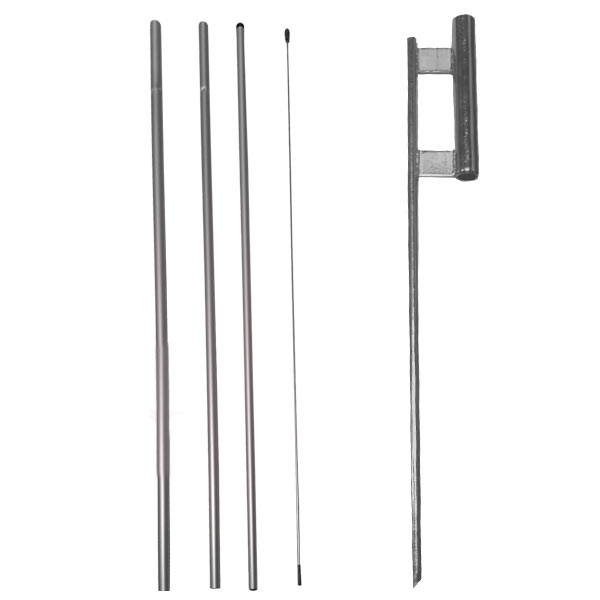
(see photo)
Best Fiberglass Pole Kit
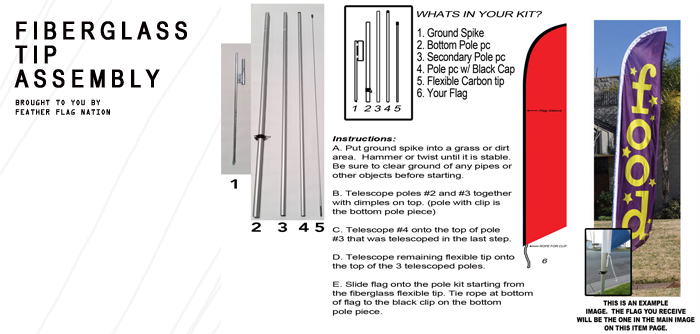
A kit comes with 6 pieces:
1. Ground Spike
2. Bottom pole pc
3. Secondary pole pc
4. Pole pc w/ black
5. Flexible carbon tip
6. Your flag
Instructions
Get a Fiberglass Pole Kit with a Travel Bag Today!
A) Put the ground spike into a grass or dirt area. Hammer or twist until it is stable. Be sure to clear the ground of any pipes or other objects before starting.
B) Telescope poles #2 and #3 together with dimples on top
C) Telescope #4 onto the top of pole #3 that was telescoped in the last step
D) Telescope remaining flexible tip onto the top of the 3 telescoped poles
E) Slide flag onto the pole kit starting from the fiberglass flexible tip. Tie rope at bottom of flag to the black clip on the bottom pole piece.
We take great pride in the quality of our products. Our custom products are made in-house from our Riverside, CA location.
REQUEST A DESIGN NOW & GET FREE SHIPPING


